How to Remove Scratches From Clear Plexiglass
Founder & Workspace Ergonomics Specialist at Desktop Carrel · Certified Professional Ergonomist (CPE), WELL Accredited Professional (WELL AP) · 13+ years testing acoustic privacy panels, modular carrels, and productivity workspace ergonomics
A scratched plexiglass carrel is one of those problems that looks worse than it is, and how to remove scratches from clear plexiglass desk carrel surfaces really comes down to matching the fix to the damage. Study carrels, library dividers, and reception sneeze guards take a beating from pens, ring binders, and cleaning cloths. The good news is that acrylic, unlike glass, can often be polished back to clarity.
The bad news is that the wrong move turns a light scuff into a permanent haze.
Acrylic softens at roughly 160°F (71°C), which is why heat-driven methods like flame polishing carry real risk on thin carrel panels. Manufacturer care guides from Röhm (Plexiglas®) and Mitsubishi Chemical (Perspex®) both stress gentle cleaning and controlled abrasives over aggressive buffing. Our research points to one honest rule: identify the scratch first, because the repair branch you pick changes everything.
Here's how to figure out what you're dealing with before you touch a single pad.
how to remove scratches from clear plexiglass desk carrel
Clean the panel with mild soap and a microfiber cloth. Test the scratch with your fingernail. If it catches, you'll need wet-sanding.
If it doesn't, a plastic polish alone usually works. Work in small sections and keep the surface wet.
First, Figure Out What Kind of Scratch You're Actually Dealing With
Scratch depth drives every decision that follows. Get this wrong and you'll either waste an afternoon polishing a gouge that needs sanding, or sand a hairline scuff until the panel clouds. So slow down and classify the damage first.
The fingernail test is the quickest tool you've got. Drag a fingernail lightly across the scratch, perpendicular to its direction. If your nail glides over it, that's a hairline scuff or light haze.
If it catches slightly, you're looking at a moderate surface scratch. If it snags hard or you can feel a groove, that's a deep gouge.
Raking light tells you the rest. Hold a bright flashlight at a low angle across the panel. Hairline scuffs show as faint smears.
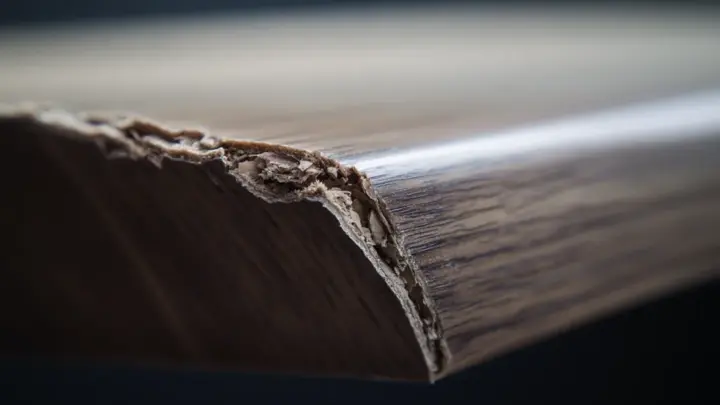
Surface scratches appear as thin lines. Deep gouges cast shadows and often have rough edges. Crazing, by contrast, looks like a spiderweb of tiny cracks inside the material, not on it.
That last distinction matters more than people realize. Crazing signals internal stress in the acrylic, and no amount of polishing fixes it. In our research, crazed panels almost always need replacement, not repair.
Polishing them just wastes time and can make the visible cracks worse.
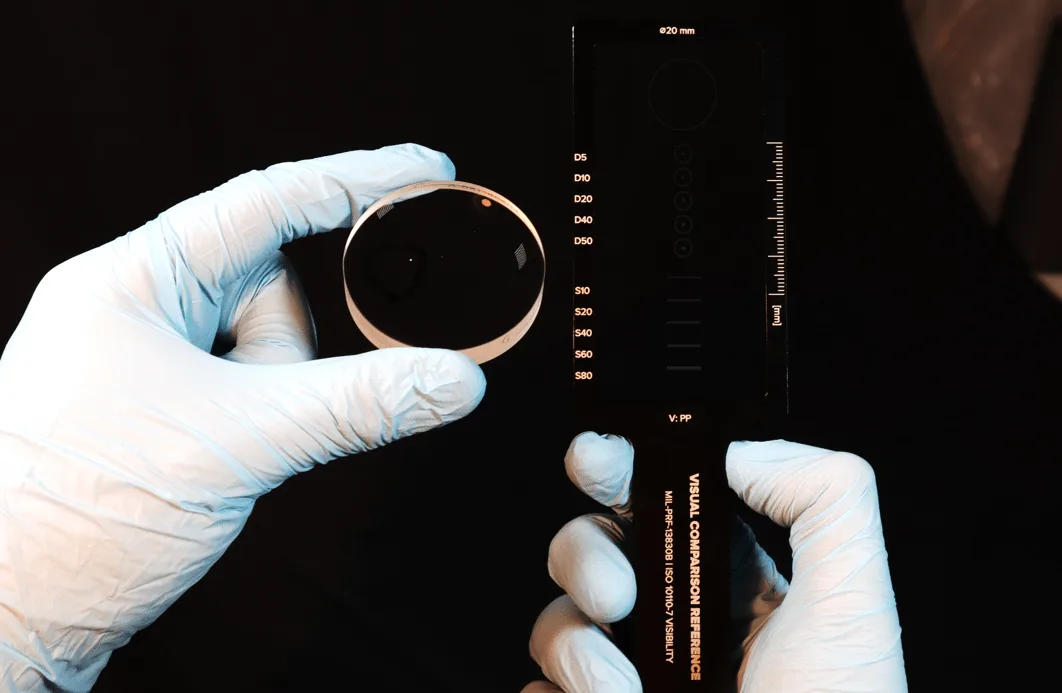
Image source: Web (Bing) / redlux.net (Web image (fair-use with source credit))
Here's the quick classification ladder:
| Scratch Type | Fingernail Test | Depth (approx.) | Repair Method |
|---|---|---|---|
| Hairline scuff / haze | Glides over | 1–5 µm | Polish only |
| Surface scratch | Slight catch | 5–25 µm | Wet-sand + polish |
| Deep gouge | Hard snag | 25+ µm | Aggressive sand or replace |
| Crazing / cracks | Feels internal | N/A | Replace panel |
Image source: Web (Bing) / theclassroom.co (Web image (fair-use with source credit))
One more thing worth checking before you commit: coatings. Many institutional carrels, especially post-2020 medical and reception panels, ship with anti-static or anti-fog coatings. Abrasives strip these instantly.
If your panel has a coated film on one side, and you can usually spot it by a faint sheen or manufacturer sticker, skip the sanding branches and go straight to a mild polish or a pro.
The Right Method for Your Scratch: A Decision Guide
This is where the if/then logic kicks in. Pick your branch based on what the fingernail test told you. Don't mix methods.
Don't jump ahead.
Branch 1: Light scuffs and haze, polish only
If your nail glides over the mark, you're in the easiest branch. Reach for a plastic polish like Novus 2 or Meguiar's PlastX. Apply a small amount to a clean microfiber cloth.
Work it in circles with light pressure for 30 to 60 seconds per section.
Wipe with a clean cloth and check under raking light. Most hairline haze disappears in a single pass. If it doesn't, repeat once.
Two passes is usually the ceiling here. More than that and you're just wearing down the surface.
Branch 2: Moderate surface scratches, wet-sand then polish
If your nail catches slightly, polish alone won't cut it. You need to level the surface first. That means wet-sanding through a grit progression, then polishing the sanding haze out.
We'll walk through the full process in the step-by-step section below.
The key insight for this branch is patience. Skipping from 600 grit straight to 3000 leaves visible swirl marks. Every intermediate grit does a job.
Skip one and the next stage can't hide it.
Branch 3: Deep gouges, aggressive sanding or replacement
If your nail snags hard, you're facing a real groove. You can wet-sand it out, but you'll remove a noticeable amount of material in the process. On a thin 1/8-inch carrel panel, that can create a visible dip that distorts reading light.
The honest call here: if the gouge is smaller than a grain of rice, wet-sand it. If it's longer than your thumbnail, price a replacement panel. A custom-cut acrylic panel runs about $40 to $200 depending on size and thickness.
Your time is worth more than that on a deep repair.
Branch 4: Crazing or cracks, do not repair, replace
Crazing means the acrylic has failed internally. Polishing won't touch it, and sanding can accelerate crack propagation. Replace the panel.
This is the shortest branch in the guide for a reason.
Quick-reference decision table
| Situation | Do This | Skip This |
|---|---|---|
| Hairline scuff, no nail catch | Plastic polish, 1–2 passes | Sanding, buffing machines |
| Surface scratch, slight catch | Wet-sand 600→3000, then polish | Flame polishing |
| Deep gouge, hard snag | Sand out small ones, replace large ones | Polish-only attempts |
| Crazing or cracks | Replace panel | All repair methods |
| Coated panel (anti-static/fog) | Mild polish or pro service | Any abrasive |
What You'll Need (and What to Skip)
You don't need a workshop full of gear. A basic kit covers 90% of carrel scratches. Here's what actually earns its place on the bench.
- Micro-Mesh sanding pads in a grit progression: 600, 800, 1200, 1500, 2000, 3000, and 8000
- Plastic polish (Novus 2, Meguiar's PlastX, or a cerium oxide slurry for final finish)
- Spray bottle with clean water and a drop of mild dish soap
- Microfiber cloths (at least four, kept separate for sanding, wiping, and polishing)
- Foam-backed sanding block or a soft rubber pad
- Painter's tape for masking edges and coated zones
- Nitrile gloves and safety glasses
- Optional: dual-action polisher with a foam pad (variable speed, keep it under 2,000 RPM)
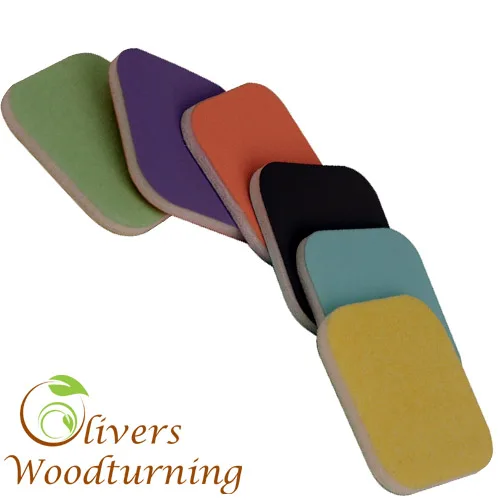
Image source: Web (Bing) / oliverswoodturning.co.uk (Web image (fair-use with source credit))
Now the skip list. These are the products that show up in every forum thread and do more harm than good:
- Toothpaste. It's abrasive, uneven, and leaves a residue film. Skip it.
- Paper towels. The fibers trap grit and scratch deeper. Use microfiber only.
- Ammonia-based cleaners like Windex. Per acrylic manufacturer care guides, ammonia attacks the surface over time and promotes crazing.
- Acetone, MEK, and rubbing alcohol. These are solvents for acrylic, not cleaners. They'll melt the surface finish.
- Rotary buffers set too high. Anything over 3,000 RPM risks heat warping. Acrylic softens at about 160°F.
Cost-wise, a decent DIY kit lands between $15 and $60 as of 2026. A single Novus 1-2-3 system runs about $20. Micro-Mesh kits start around $25.
A professional acrylic restoration service typically charges $75 to $300 per panel, which is worth considering if you're dealing with a large or coated carrel.
Step-by-Step: Wet-Sanding and Polishing a Plexiglass Carrel
This section walks through the full wet-sand and polish workflow. It's the method for Branch 2 scratches, and it also handles the smaller gouges in Branch 3.
Before you start, set up your space. Work in a clean, dust-free area between 65°F and 75°F. Dust is the enemy of a clear finish.
If you're working in a library or office, drape a clean sheet under the panel and close nearby vents.
Step 1: Clean and tape
Wash the panel with mild soap and water. Dry with a clean microfiber cloth. Tape off the edges and any coated zones with painter's tape.
This keeps abrasive slurry off the areas you don't want to touch.
Step 2: Start at 600 grit (only if you have a real scratch)
For a moderate surface scratch, begin at 600 grit. For a light scratch that only needed polish, skip this entire section. Keep the pad and the panel wet at all times.
Dry sanding generates heat and clogs the pad.
Step 3: Sand perpendicular to the previous direction
This is the single most important technique in the whole process. Sand in one direction. When you move to the next grit, sand perpendicular to the last pass.
That way you can see when the previous grit's scratches are gone.
Image source: Bing (Web (fair-use with source credit))
Step 4: Progress through the grits
Move up: 600 → 800 → 1200 → 1500 → 2000 → 3000. Spend about 30 to 60 seconds per grit on a small section. Keep the surface wet.
Wipe clean between grits so you can inspect your progress.
Step 5: Final polish with compound
Once you hit 3000 grit, the surface should look slightly hazy but uniform. Now apply your plastic polish with a foam pad or microfiber cloth. Work in small circles with light pressure.
A dual-action polisher at low RPM speeds this up, but hand-polishing works fine on small scratches.
Step 6: Final wipe and cure
Wipe away polish residue with a clean microfiber cloth. Let any protective coating cure for at least 24 hours before reassembling or heavy use. Check the panel under raking light.
If you still see fine haze, one more polish pass with a fine compound usually clears it.
| Step | Tool | Time | Key Rule |
|---|---|---|---|
| Clean + tape | Soap, microfiber, tape | 10 min | Remove all grit |
| Sand 600→3000 | Micro-Mesh pads + water | 30–90 min | Keep wet, change directions |
| Polish | Foam pad + compound | 15–30 min | Light pressure, low RPM |
| Cure | N/A | 24 hrs | No handling or cleaning |
Mistakes That Turn a Fix into a Replacement
The fastest way to ruin a plexiglass carrel is to rush it. Our research into user reports and manufacturer guidance keeps surfacing the same handful of errors. Avoid these and you'll save yourself a panel.
Skipping grits is the number one mistake. Going from 600 straight to 2000 leaves deep scratches the polish can't hide. Every grit in the sequence refines the surface.
Skip one and you're polishing over damage you can't see yet.
Cross-grain sanding is the second. If you sand in the same direction with every grit, you can't tell when the previous scratches are gone. Change direction with each grit.
It's the only way to read your own progress.
Over-buffing is the third, and it's the most expensive. Running a rotary buffer too fast or too long heats the acrylic. At around 160°F, the surface starts to warp.
Once it does, no amount of polishing brings back the flat clarity. Keep RPM under 2,000 and pause often to let the panel cool.
Using ammonia-based cleaners after the repair is the fourth. It undoes your work over time. Stick with mild soap, water, and a plastic-safe cleaner.
Same rule applies to the coatings on coated panels: if you sand or clean them off, you lose the anti-static or anti-fog performance permanently.
PPE is not optional here. Acrylic dust is a lung irritant, so wear an N95 mask and safety glasses. Nitrile gloves protect against solvents.
If you're flame polishing edges, you're using an open hydrogen or propane flame, and that's an NFPA 55 territory with real fire risk. Most institutional settings forbid on-site flame work without a permit, so check facilities policy first.
Safety, Coatings, and Institutional Rules to Know First
PPE protects you and the panel both. Acrylic dust is a respiratory irritant, so an N95 mask and safety glasses are the baseline. Nitrile gloves shield your skin from polishing compounds and solvents.
Skip the gloves and you'll spend the next hour scrubbing cerium oxide off your hands.
Ventilation matters more than most people think. Sanding dust and solvent fumes build up fast in a small study room. Crack a window or work near an exhaust fan.
If you're flame polishing edges, you're running an open hydrogen or propane flame near a soft plastic sheet. NFPA 55 covers compressed gas handling, and most institutional settings require a hot-work permit for this. In our research, flame polishing is the single highest-risk step in the whole repair process.
For a carrel surface scratch, you don't need it.
Chemical hazards are the next trap. Acetone, MEK, and rubbing alcohol dissolve acrylic on contact. Ammonia-based cleaners like Windex cause crazing over time.
Even a single wipe can dull the finish you just restored.
Then there's the policy layer. Schools, libraries, and hospitals often classify carrel panels as fixed institutional furniture. Modifying them on-site, especially with power tools or flame, may need facilities approval.
Some coated panels void their anti-fog warranty the moment you sand them.
Check before you commit. A five-minute email to facilities saves you a panel replacement bill.
When to Call a Pro (or Just Buy a New Panel)
Some jobs aren't worth the DIY route. Here's how to tell.
Call a pro if the scratch spans more than a few inches, if the panel has a factory coating, or if it's a large privacy divider bolted into a workstation. Acrylic restoration specialists handle this daily and charge $75 to $300 per panel. That price usually includes pickup, polishing, and reinstall.
Buy a new panel if the damage is crazing, cracking, or a gouge deeper than about 25 µm. A custom-cut cast acrylic panel runs $40 to $200 depending on size and thickness. For most carrels, that's cheaper than professional repair.
The tipping point is usually time. A deep multi-gouge repair can eat two to three hours of sanding and polishing. A new panel arrives in a week and takes 20 minutes to swap.
| Situation | DIY | Pro Service | Replace |
|---|---|---|---|
| Hairline scuff | Best choice | Overkill | No |
| Small surface scratch | Good | Good | No |
| Deep gouge under 1 inch | Possible | Better | Fair option |
| Large gouge or multiple | No | Good | Best |
| Crazing or cracks | No | No | Only option |
| Coated panel | Risky | Best | Fair option |
One more angle: cast acrylic polishes far better than extruded. If your carrel uses cast sheet (look for the Plexiglas® or Perspex® stamp), DIY results are usually excellent. Extruded acrylic is softer and hazes faster, so replacement often wins.
Maintenance After the Repair: Keeping Scratches Away
A repaired panel stays clear only if you change how you clean it. Most new scratches come from bad habits, not accidents. Fix the habits and you won't be back here in six months.
Ditch paper towels forever. They trap grit and drag it across the surface. Microfiber cloths only, and keep a separate one just for the acrylic.
Use the right cleaner. Mild soap and water handles almost everything. For a plastic-safe spray, look for ammonia-free formulas labeled for acrylic or polycarbonate.
Dust before you wipe. A dry microfiber pass lifts loose grit before any liquid touches the panel. Wiping a dusty surface with a wet cloth is basically wet-sanding with whatever's on the desk.
Apply an anti-static treatment every few months. It cuts dust attraction and makes future cleaning easier. Some products double as a light polish, which helps hide micro-haze.
Keep abrasive objects off the desk surface. Ring binders, metal clips, and uncovered keyboards are the usual culprits behind fresh scratches on study carrels. A desk mat solves most of it.
For coated panels, avoid anything abrasive. No scrubbing pads, no powders, no polish with grit. Once the anti-static layer wears through, the panel hazes unevenly and looks worse than the scratch did.
FAQs About Plexiglass Carrel Scratch Repair
Can I use toothpaste to remove scratches from a plexiglass carrel?
No. Toothpaste is an uneven abrasive and leaves a residue film. It can dull a clear panel rather than restore it.
Use a proper plastic polish like Novus 2 instead. For any scratch your fingernail catches, toothpaste won't touch the depth anyway.
Will WD-40 remove scratches from acrylic?
No, WD-40 doesn't remove scratches. It can temporarily hide very fine haze by filling the surface, but the effect fades. It also attracts dust and can interfere with later polishing.
Stick with a real plastic polish for actual scratch removal.
How deep a scratch can I actually polish out?
Fine haze under about 5 µm polishes out cleanly. Scratches up to roughly 25 µm need wet-sanding first. Beyond that, you're removing visible material and risking distortion.
Deep gouges on thin panels usually make replacement the smarter call.
Do I need a machine buffer, or can I do it by hand?
Hand-polishing works fine for small scratches and haze. For a full carrel panel or multiple scratches, a dual-action polisher saves serious time. Keep RPM under 2,000 to avoid heat warping.
Acrylic softens around 160°F, and once it warps, it stays warped.
How long before I can use the carrel again?
Wait at least 24 hours after the final polish. Any protective coating needs that window to cure. Light handling is fine after a few hours, but skip heavy cleaning or abrasive contact for a full day.
Rushing this step can smudge an otherwise perfect finish.
What if the scratch is on an anti-fog or anti-static coated panel?
Don't sand it. Abrasives strip the coating permanently. Try a mild plastic polish first, and if that fails, call a pro.
Some coated panels can't be restored at all, and replacement is the only clean option. Check the manufacturer's care guide before touching it.

Similar Posts